
In this guide, I’m going to teach you how you can overclock your RTX 2070 graphics card with a very simple trick. One of my favorite things about RTX cards is the automatic overclocking feature, where you can get a hassle-free and stable overclock. The days where you manually configure settings to get a high-performance overclock are already gone. So, the thing we should be focused on is automatic overclocking, which works only on any RTX graphics cards including RTX 2070. I am using MSI Afterburner since the feature is not yet supported in some software like Gigabyte Aorus Graphics Engine.
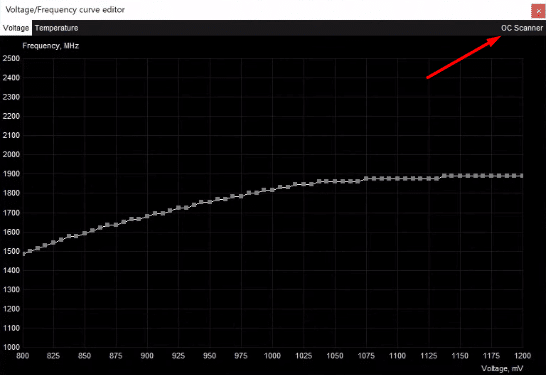
For this, we require you to get the latest beta version of MSI Afterburner to take advantage of it’s automatic overclocking. So, to get to the automatic overclocking utility, you must first press CTRL-F. This brings up the voltage frequency curve editor.
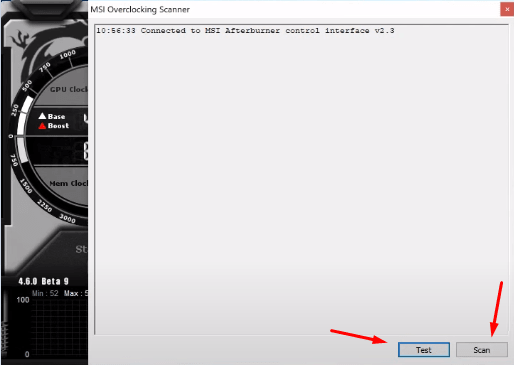
In the top right corner of the window there is the OC scanner, click on it and close the frequency curve editor and you will see the MSI overclocking scanner window.
There are two options available there Test and Scan. Tests will check for stability, and Scan will give you a high performance overclocking. Click the Test first, then scan. And in around 20 minutes, your overclock will be configured.
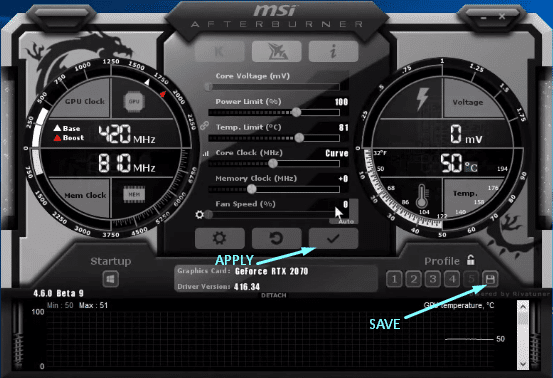
Here is the overclock provided by the MSI scanner:

After the MSI scanner is done, apply the settings in MSI Afterburner then save it to a profile.
This GPU-Z screen shows the specs of the stock RTX 2070 along with the same window after applying the overclock from the OC scanner.
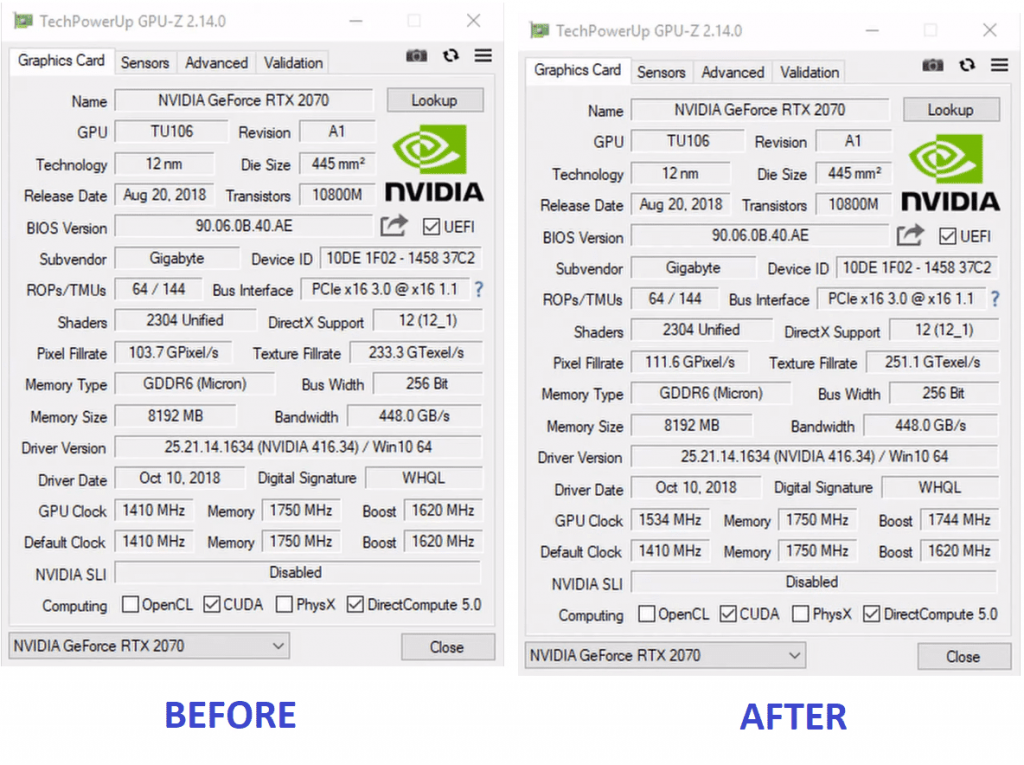
You can see that the GPU clocks and boost clocks have a good increase. In games, the clock speeds will be even higher. For me, the number in games is typically somewhere above 1900 megahertz. With the OC scanner, you could have more performance than some factory overclocked RTX 2070s.