Table of Contents
- Understanding SPDIF And Its Benefits
- Checking Your Motherboard For SPDIF Out
- Enabling SPDIF Out In Your Computer’s Settings
- Configuring Your Audio Device For SPDIF Input[+]
- Connecting Your Motherboard’s SPDIF Out Port To Your Audio Device
- Optimizing Audio Settings For The Best Performance[+]
- Additional Tips For Using SPDIF Out On Your Motherboard
- Troubleshooting Common Issues With SPDIF Out
Many modern motherboards come equipped with a SPDIF out port, which can be used to connect your computer to external audio devices, such as home theater systems or digital audio receivers. While using SPDIF may seem daunting at first, it can provide an easy way to enjoy high-quality audio playback without the need for additional hardware or a complicated setup.
In this guide, we will walk you through the steps to use SPDIF on your motherboard, including how to enable it in your computer’s settings, connect it to an external audio device, and troubleshoot common issues that may arise. By the end of this guide, you should have a better understanding of how to use SPDIF on your motherboard and be able to enjoy high-quality digital audio from your computer with ease.
Understanding SPDIF And Its Benefits
SPDIF, or Sony/Philips Digital Interface, is a type of digital audio interface used to transfer high-quality digital audio signals between devices. SPDIF is commonly used to connect audio devices like DVD players, digital audio workstations, and home theater systems to external audio equipment, such as amplifiers or receivers.
One of the main benefits of SPDIF is that it allows for lossless audio transfer, meaning that there is no loss of audio quality during the transmission process. This is in contrast to analog audio cables, which can suffer from signal degradation and noise over long distances.
SPDIF also supports a range of audio formats, including uncompressed PCM audio, as well as compressed formats like Dolby Digital and DTS. This makes it a versatile and flexible option for connecting different types of audio equipment.
Additionally, SPDIF uses a single digital audio cable to transmit audio, which can help reduce clutter and simplify your audio setup. This is especially useful in home theater setups where multiple audio devices are connected to a single amplifier or receiver.
Overall, the benefits of using SPDIF include high-quality audio transfer, support for multiple audio formats, and a simplified audio setup. If your motherboard supports SPDIF, it can be a great way to connect your computer to external audio equipment and enjoy high-quality digital audio playback.
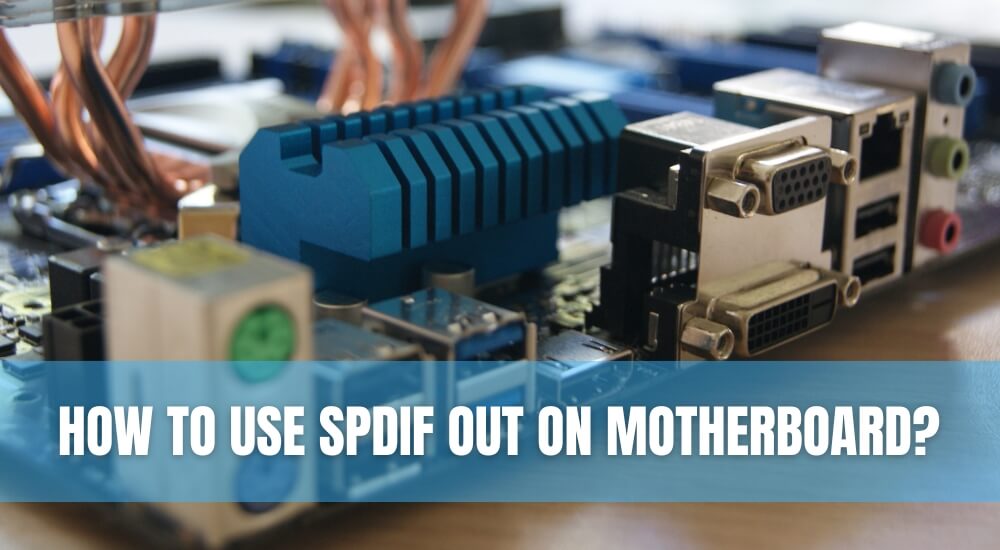
Checking Your Motherboard For SPDIF Out
To check if your motherboard has a SPDIF out port, you can follow these steps:
- Power off your computer and unplug it from the wall to ensure your safety.
- Open your computer case. The process for doing this will depend on your specific computer model, but it typically involves removing screws or clips on the back or side of the case.
- Locate your motherboard. This is the large circuit board that contains many of your computer’s internal components.
- Look for the SPDIF out port on the back panel of the motherboard. This is typically a small rectangular port with a red light emitting from it, indicating that it is an optical SPDIF port. It may also be labeled as “Optical out” or “Digital out”.
- If you are having difficulty finding the SPDIF out port, consult your motherboard’s manual or check the manufacturer’s website for more information.
Enabling SPDIF Out In Your Computer’s Settings
Once you have confirmed that your motherboard has a SPDIF out port, the next step is to enable it in your computer’s audio settings. Here are the general steps to follow:
- Open your computer’s audio settings. This can typically be done by right-clicking on the volume icon in your system tray and selecting “Open Sound settings” or “Playback devices”.
- Select your SPDIF output device from the list of available audio devices. If it’s not already listed, make sure it is properly connected and recognized by your computer.
- Set your SPDIF output device as the default audio playback device.
- Configure any additional audio settings as needed, such as audio quality or speaker configuration.
Configuring Your Audio Device For SPDIF Input
To configure your audio device for SPDIF input, follow these steps
- Make sure your audio device supports SPDIF input. This may involve checking the device’s documentation or contacting the manufacturer.
- Locate the SPDIF input port on your audio device.
- Connect the SPDIF cable from your motherboard’s SPDIF out port to the audio device’s SPDIF input port.
- Turn on your audio device and set it to receive audio input from the SPDIF input. The process for doing this will vary depending on the specific device, but it typically involves selecting the appropriate input source using the device’s remote or front panel buttons.
- Configure any additional audio settings as needed, such as volume or audio quality.
Connecting Your Motherboard’s SPDIF Out Port To Your Audio Device
Connecting your computer’s motherboard to an external audio device via SPDIF is a great way to get high-quality digital audio output. To connect your motherboard’s SPDIF out port to your audio device, you will need a SPDIF cable with appropriate connectors. Follow these steps: Turn off your computer and unplug it from the wall for safety.
- Locate the SPDIF out port on the back panel of your motherboard.
- Connect one end of the SPDIF cable to the SPDIF out port on your motherboard.
- Locate the SPDIF in port on your audio device.
- Connect the other end of the SPDIF cable to the SPDIF in port on your audio device.
- Turn on your audio device and set it to receive audio input from the SPDIF input. The process for doing this will vary depending on the specific device, but it typically involves selecting the appropriate input source using the device’s remote or front panel buttons.
- Configure any additional audio settings as needed, such as volume or audio quality.
Optimizing Audio Settings For The Best Performance
After connecting your motherboard’s SPDIF out port to your audio device, you may need to optimize your audio settings to get the best performance. Here are some tips to help you optimize your audio settings:
Select the correct audio output device
Make sure that your computer is set to output audio through the SPDIF out port. This can usually be done by going into your computer’s audio settings and selecting the appropriate output device.
Adjust audio quality settings
You can adjust the audio quality settings in your computer’s audio settings to optimize the sound quality. This may include adjusting sample rate, bit depth, and channel count.
Enable surround sound
If you are using a surround sound system, make sure that it is properly configured to receive surround sound audio. This may involve selecting the appropriate audio format and enabling surround sound in your computer’s audio settings.
Install audio drivers
Make sure that you have the latest audio drivers installed for your computer’s audio chipset. This can help to ensure that your audio system is working properly and that you are getting the best performance.
Use quality cables
Make sure that you are using high-quality cables to connect your computer to your audio device. Poor-quality cables can introduce noise and interfere with the audio signal.
Additional Tips For Using SPDIF Out On Your Motherboard
Here are some additional tips for using SPDIF on your motherboard:
- Use the correct type of SPDIF cable
SPDIF cables come in different types, such as coaxial and optical. Make sure to use the correct type of cable that matches your motherboard’s SPDIF out port and your audio device’s SPDIF in port.
- Make sure your audio device supports SPDIF input
Some older or budget audio devices may not support SPDIF input. Make sure to check your device’s specifications to ensure that it supports SPDIF input before attempting to connect it to your computer.
- Turn off other audio devices
If you have other audio devices connected to your computer, such as speakers or headphones, make sure to turn them off or disconnect them before connecting your computer to your audio device via SPDIF. This can prevent conflicts and ensure that the SPDIF connection is the primary audio output.
- Check for updates
Check for updates for your computer’s audio drivers and your audio device’s firmware. Updating these components can help improve performance and fix any bugs or issues.
- Use a power conditioner
If you are experiencing electrical noise or interference in your audio signal, consider using a power conditioner to filter out any unwanted noise.
- Use a DAC (Digital-to-Analog Converter)
This can help improve audio quality and reduce noise.
Troubleshooting Common Issues With SPDIF Out
While SPDIF out is a reliable method of transmitting digital audio, there are some common issues that users may encounter. Here are some tips for troubleshooting these issues:
- No audio output
Make sure that your audio device is set to receive audio through the SPDIF input, and that your computer’s audio settings are configured to output audio through the SPDIF out port.
- Poor audio quality
Try adjusting the sample rate, bit depth, and channel count to see if this improves audio quality. Also, make sure that you are using high-quality cables, as poor-quality cables can introduce noise and interfere with the audio signal.
- Audio dropouts
If your audio is cutting out or experiencing dropouts, this may be due to interference or electrical noise. Try moving your audio device away from other electronic devices, or use a power conditioner to filter out any unwanted noise.
- No surround sound
- This may involve selecting the appropriate audio format and enabling surround sound in your computer’s audio settings.
- Compatibility issues
Make sure to check your device’s specifications to ensure that it supports SPDIF input before attempting to connect it to your computer.
- Outdated drivers
Check for updates for your computer’s audio drivers and your audio device’s firmware. Updating these components can help improve performance and fix any bugs or issues.
With these troubleshooting tips, you can overcome common issues with SPDIF and enjoy high-quality digital audio.
Conclusion
- SPDIF on your motherboard enables simple and effective digital audio transmission to external devices.
- Optimize audio by configuring settings like sample rate, and bit depth, and troubleshooting with high-quality cables.
- SPDIF is ideal for high-quality digital audio in home theaters, soundbars, or DACs, offering superior transmission over analog.
- Utilizing SPDIF enhances your media experience with immersive, high-quality audio for movies, music, or gaming.